How to Match Metal Building Gutters
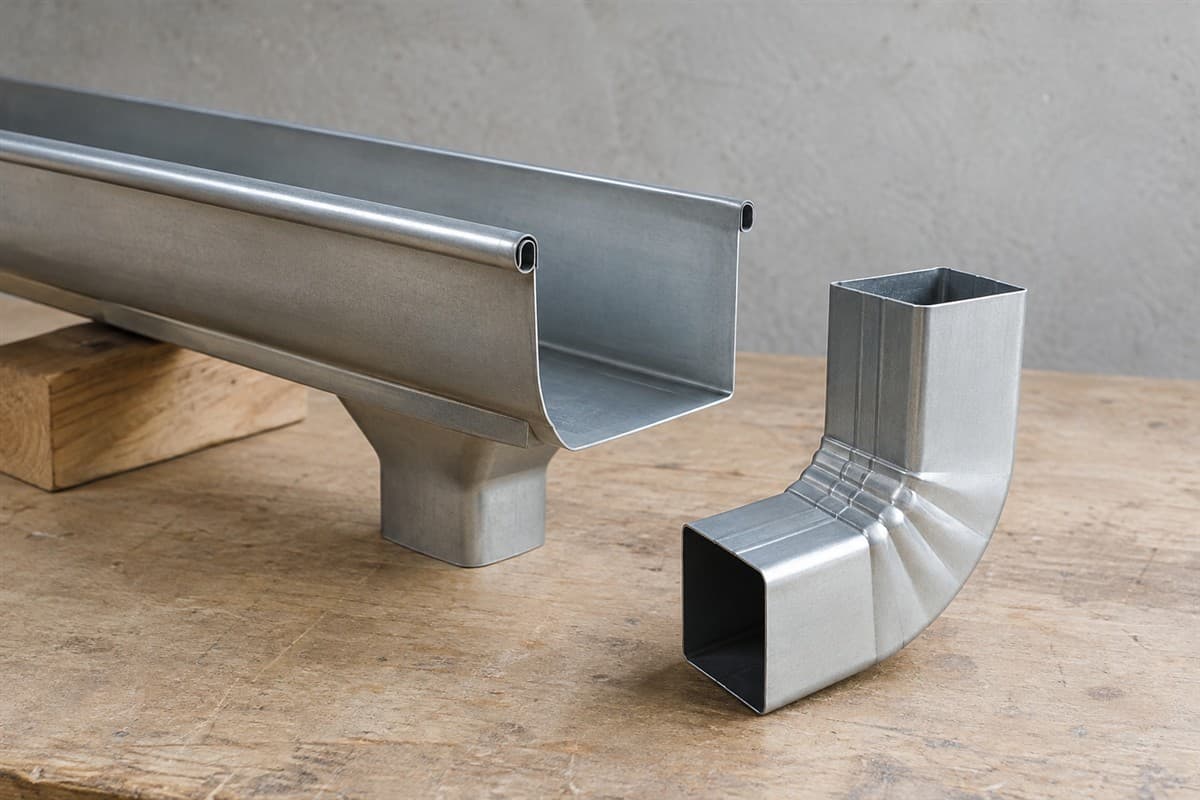
A replacement gutter needs to match more than the width you see from the yard. Compare its end shape, mounting edge, outlet, and connection to the downspout. Start with an intact loose piece if you have one.
This process helps you describe an existing system and compare replacement parts. It does not tell you whether the old system was large enough. If rain regularly spills over it, ask a gutter specialist to check drainage before copying the old parts.
Follow the water route before measuring
The gutter is the open channel along the roof edge. A downspout is the pipe carrying its water downward. The outlet is the opening and connecting piece between them. An elbow is a bent section that changes the pipe's direction.
Look from the ground and draw that route on paper. Name each run by its location, such as rear wall or door side. Show corners, outlets, elbows, and the point where each downspout ends.
Add visible trouble spots without deciding their cause. Write water spills here, joint drips here, or section hangs lower here. That gives the person helping you a place to inspect.
For roof-edge work, use suitable fall protection and hire a pro if you cannot reach the parts safely.
Gather a tape measure, ruler, pencil, cardboard, phone camera, and gloves for handling loose metal. Use existing photos or have a pro take inaccessible measurements. Do not pull off an installed gutter simply to get an end view.
Measure the intact cross-section
A cross-section is the shape seen when looking straight into the end of a part. A gutter's cross-section includes its bottom, back, front, and folded lips.
- Choose a sound sample. Use a spare section or an already removed piece. Avoid measuring a crushed area as the original shape.
- Set the viewpoint. Put the roof side away from you and label it on your paper. Keep that viewpoint for the sketch and photos.
- Measure the opening. Measure straight across the open top. State whether your endpoints are inside faces or outside edges.
- Measure the bottom. Record its width separately. Sketch any slope or bend you can see without trying to flatten it.
- Measure the two sides. Record back height and front height from the bottom. Do not assume they are equal.
- Draw the folded edges. Show any lip folded inward, outward, or back on itself. Add a close photo when a ruler hides the bend.
- Record the mounting edge. Photograph the side that meets the building and any existing support connection. Keep those observations separate from new fastening instructions.
Write units beside every measurement. An end photo can help explain the shape, but your written readings carry the dimensions. If you cannot measure a feature, label it unknown.
When two parts look different, sketch both. A wider opening does not describe the entire shape. Nor does a familiar box-like appearance establish that two sections will join.
Check the outlet as its own part
Take a wide photo showing where the outlet sits in the gutter. Then photograph the connection to the downspout. With a loose sample, measure the connection opening in both directions, or its diameter if round.
Record whether each reading measures the clear opening or the outside of the metal. These are different endpoints. Photograph the actual joint so the seller can see which part fits inside the other.
A box-shaped gutter can connect to a round downspout through a matching outlet. Do not choose the pipe shape solely from the gutter shape. Follow the actual connection.
Measure a loose elbow's ends separately. Place it beside your route sketch and show which way it turns. A front photo alone may hide whether the bend moves toward the wall or along it.
Do not cut a larger outlet or add another downspout while trying to match parts. Changes to drainage capacity and routing need a separate plan. Your building's drawings or the gutter maker's instructions decide mounting patterns and support spacing; local drainage conditions need a specialist's sizing check.
Fill out the gutter and outlet record
Use one copy of this worksheet for each different shape. Add photo names in the final column.
| Record field | What to write | Evidence to attach |
|---|---|---|
| Run location | Wall name and endpoints | Ground-level overview |
| Gutter end shape | Opening, bottom, front, back, and folded lips | End sketch and straight end photo |
| Measurement endpoints | Inside or outside, with units | Ruler beside the feature |
| Mounting side | Existing bends and connections | Rear-edge close view |
| Outlet | Shape, clear opening, and joining end | Gutter-to-pipe photo |
| Downspout | Shape and outside dimensions | Loose end or safe close view |
| Elbow direction | Toward wall, away from wall, or along wall | Side view beside route sketch |
| Visible trouble | Overflow, dent, loose joint, or unknown | Photo during the observed condition |
| Missing information | Exact feature still unmeasured | Question beside its sketch |
Keep a damaged sample's readings marked damaged. If another intact section differs, retain both sets rather than averaging them. You are describing parts, not smoothing out discrepancies.
Compare candidates and finish the list
Compare Gutter and Downspout with the corresponding worksheet rows. Ask for end drawings and connection information when the listing does not show them. Both catalog entries await confirmation, so keep unresolved details on your list.
Do not assume the gutter listing includes outlets, elbows, supports, or end pieces. Name every required piece separately and confirm what the listing contains. A matching channel still needs a matching route to the ground.
For nearby edge parts, Metal Roof Trim Names: How to Identify Each Edge helps name the roof location. It does not replace the gutter end sketch.
Avoid three shortcuts: selecting by color, using a dented end as the pattern, and treating an outside measurement as an opening measurement. Before choosing a replacement, check that the shape, connection, and intended location all agree. Keep drainage problems on a separate question line until someone has assessed them.