How to Install Rake Trim on a Metal Roof
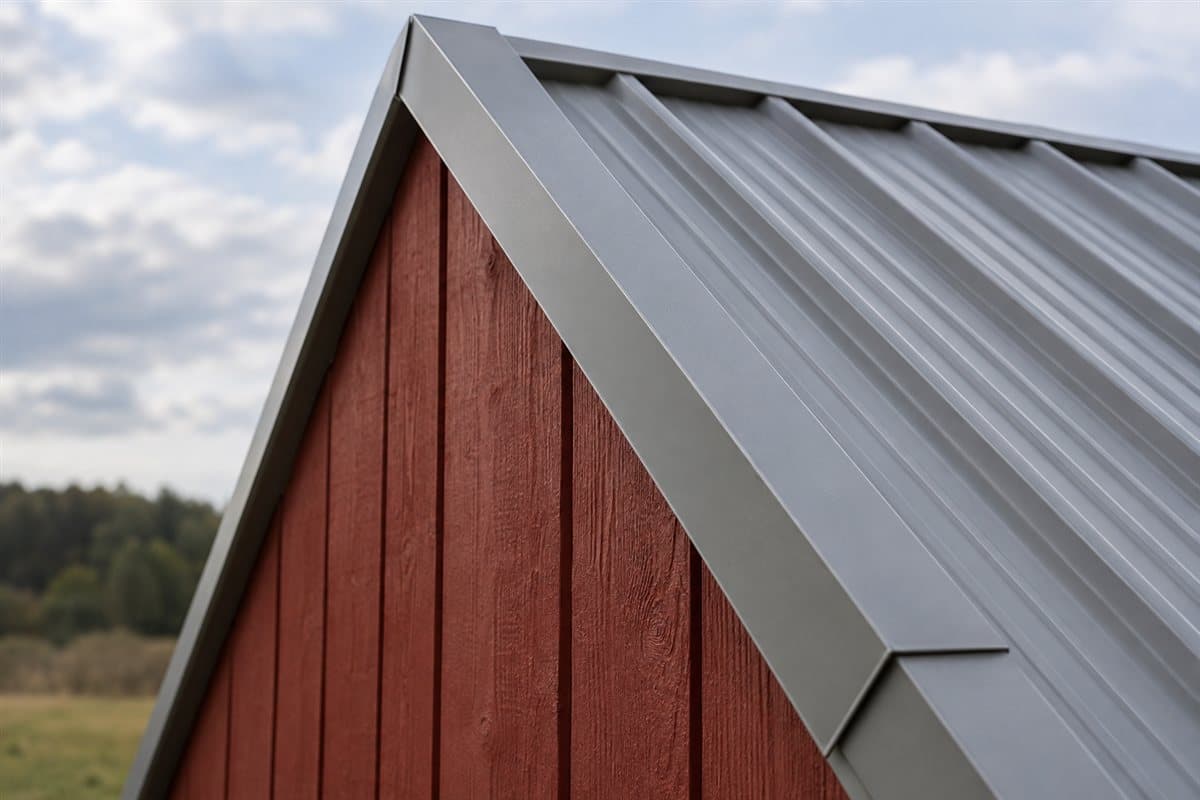
Rake trim finishes the sloping edge at a roof's gable end. A gable is the end of a building beneath two roof slopes. The rake runs from the lower roof corner toward the peak. It differs from the low edge where roof water drains.
The job is to fit the correct bent trim, finish its ends, seal the joints, and attach it as the panel guide shows. You can prepare parts and check their fit before fastening. Do not start by copying cuts from an unrelated roof.
For roof work, use suitable fall protection and hire a roofer if you cannot work safely.
Find the matching edge detail
Identify the panel's profile, its shape viewed from the end. Search the panel maker's website for its installation guide. Look under rake, gable trim, or gable flashing in the contents. Flashing is metal shaped to direct water at an edge or joint.
If the barn has no paperwork, photograph a spare panel's end and both side edges. Use How to Match Old Metal Roof Panels to identify the panel before choosing the trim detail.
Match the guide's drawing to the actual edge. Does the roof panel end beside a wall panel, wood face board, or another arrangement? The fascia is the board or metal face at a roof edge. Different arrangements can use different trim bends and attachments.
Check the guide's lower-end and peak illustrations too. The eave is the low roof edge. The ridge is the peak where two slopes meet. The rake has to finish correctly at both.
Lay out the tools and loose trim
Gather a tape measure, pencil, straightedge, cut-resistant gloves, and eye protection. Add metal-cutting snips, which are hand shears for thin sheet. A hand seamer is a gripping tool for bending a small sheet-metal tab. Use it only for the folds your detail shows.
Have the required driver and its matching head attachment ready. Put sealant, tape, and joining fasteners on the list only if the chosen detail uses them.
On a bench, compare the trim's end shape with the drawing. Identify its roof-facing leg and wall-facing leg. A leg is one flat section between bends. A hem is an edge folded back on itself.
Measure the accessible roof-edge run or use measurements collected safely by a roofer. Keep the run length separate from the extra material needed for joints and end folds. Those allowances come from your building's drawings or the panel maker's installation instructions.
Work from the lower end toward the peak
Use this order for a matched exposed-fastener rake detail, meaning one with visible screw heads. Follow a different sequence if your exact guide shows one.
- Check the underlying edge. Look for damaged panels, loose edge material, or decay. Resolve those conditions before covering them with trim.
- Fit the first piece without fastening. Hold its face in the position shown by the guide. Check where it meets the eave trim and the panel edge.
- Mark the lower end. Transfer the guide's cut and fold arrangement onto the loose trim. Make a paper pattern first if the shape is hard to picture.
- Cut and form the end on the bench. Use the specified cutting tool and folds. Keep cuts away from finished roof surfaces and remove sharp scrap.
- Prepare the joint seal. Clean the contact surfaces as the sealant instructions require. Place the specified tape or sealant where the detail shows it before closing the joint.
- Position and attach the piece. Keep the trim face aligned without forcing the sheet to change shape. Use the attachment locations and fastener types from the matched detail.
- Fit the next piece. Prepare its joining end and seal the overlap as shown. Continue checking the edge line before fastening each piece.
- Finish the peak connection. Use the guide's relationship between rake ends and ridge cap. Fit the loose end before making the final cut.
- Clean and inspect. Remove metal chips and scrap. Look at the lower exit, intermediate joints, and peak from the same direction as your original sketch.
Your building's drawings or the panel maker's installation instructions decide overlaps, fastening patterns, driving torque, and wind or snow requirements. Do not replace these with a copied number from another roof's tutorial.
Use the rake-end and peak card
Complete the card before cutting. It catches missing end information that a straight-edge drawing can hide.
| Location on this rake | What to identify | What to carry to the bench |
|---|---|---|
| Low corner | How rake trim meets eave trim | Lower-end sketch and intended water exit |
| Roof-facing leg | Which panel surface it covers | Matched profile drawing |
| Outer face | What sits behind the trim face | Side-view photo of the edge |
| Intermediate joint | Which piece covers the next | Overlap and seal instructions |
| Peak | How the two rake ends meet the ridge cap | Peak illustration and cut/fold sketch |
| Fastening | Which connections join sheets or reach support | Separate fastener callouts |
Write the instruction page beside each sketch. If the peak is missing from the guide, ask for that specific arrangement before cutting. A longer straight piece does not solve an unknown end shape.
Avoid covering a bad fit with extra fasteners
Do not pull an incorrect trim shape into place by driving harder. Do not leave cut scrap on the panels. Do not make all the end cuts before test-fitting the first piece.
The listed Rake trim is the relevant trim family. Stitch screws (lap screws) for panel side laps and trim and Butyl tape sealant are candidates only where the matched detail calls for them. These entries await confirmation; the catalog alone does not establish your exact bends or seal requirements.
Use Metal Roof Trim Names: How to Identify Each Edge if the roof edge is still unclear. Use Rivets vs Stitch Screws: How to Choose for Metal Trim for a joining-method comparison. At the lower corner, continue with How to Install Eave Trim on a Metal Roof. At the peak, use How to Install Ridge Cap on a Metal Roof. For the wall trim that meets the rake, continue with What trim pieces does a metal building wall need?.