How to Measure Metal Inside Corner Trim
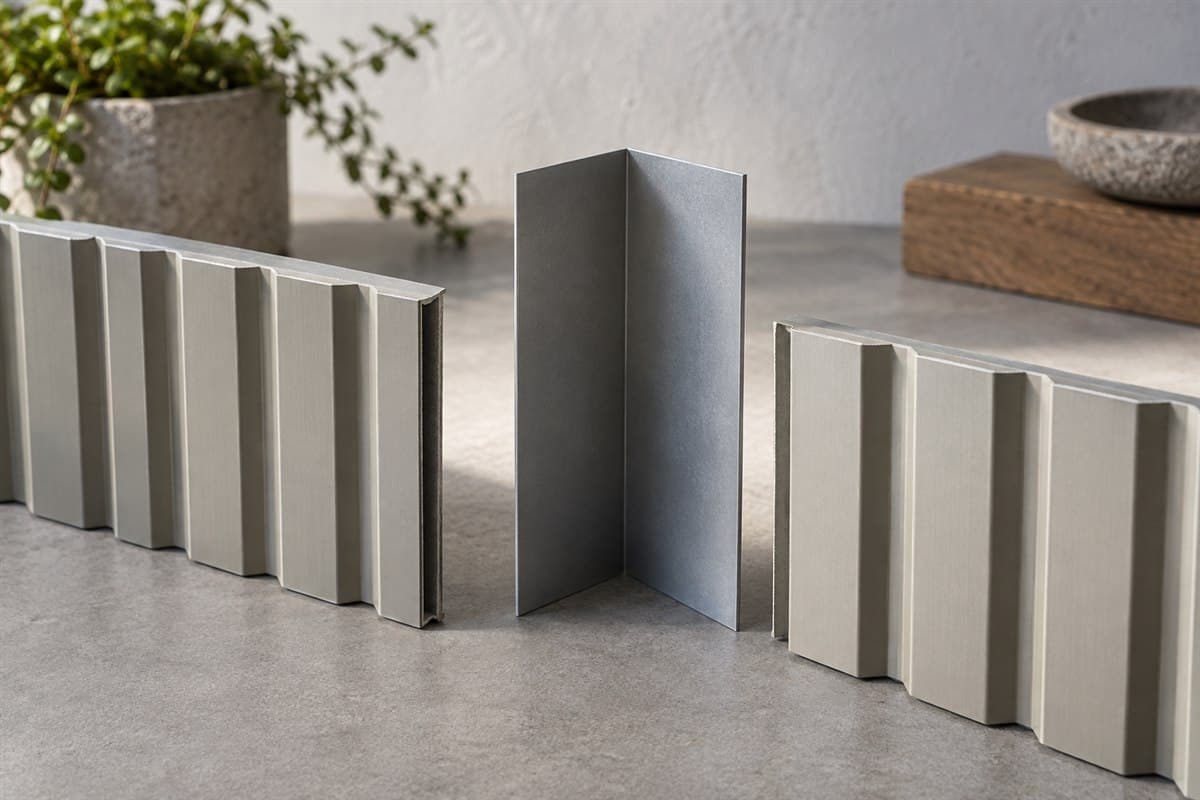
Look into the corner where the two wall faces meet. Then compare that junction with the end shape of the trim. A piece called inside corner trim still needs a shape check before you select it.
An inside corner is the inward junction between wall faces. Corner trim is the formed piece finishing that junction. This measuring method gives you a record of its legs, bends, and visible face.
Work from a loose piece when possible
Find an undamaged spare piece or an old offcut, meaning a leftover cut piece. Use a tape measure, short ruler, pencil, cardboard, and phone. Wear gloves because cut metal edges can be sharp.
Keep an attached corner intact while you investigate. Photograph it in place. A spare trim piece is more useful than a distorted piece pulled from the wall just to measure it.
If there is no spare, measure accessible visible faces and mark hidden edges unknown. Ask for help obtaining the missing shape information before placing the order. Do not flatten a piece to discover its original bend.
Clean enough loose dirt away to see the outline. Follow the finish care instructions if more cleaning is needed. Choose an intact end rather than one crushed during storage.
Make a consistent end-view record
- Set a viewpoint. Place the piece with its end toward you. On paper, label the wall faces A and B. Keep those labels throughout the record.
- Draw the outline. Sketch the shape as seen from the end. Include each flat section, bend, lip, and folded edge. This outline is the trim's profile.
- Measure the first leg. A leg is a section between bends or an edge and a bend. Lay the ruler along it. Write exactly where your measurement starts and stops.
- Measure the second leg. Record it separately even if the two legs look equal. Keep the same measuring convention so the comparison makes sense.
- Record any folds. A hem is an edge folded back on itself. Draw which way it turns. Note other lips without calling every bend a hem.
- Mark the visible finish. Show which face will be seen from the room. Photograph both faces if the finish direction is unclear.
- Measure along the piece. Record its full existing length from end to end. Keep that reading separate from the length needed at your wall.
These are measurements of a part you already have. They are not required trim dimensions for another building.
Use a straight end photo to support the sketch. Take another view from above to show the length and surface. Place a ruler beside the loose piece without covering a small fold.
Compare the corner and the candidate side by side
Fill in this record before treating a product as a match. Describe differences in words when a drawing is clearer than a measurement.
| Feature | Existing trim or wall junction | Candidate trim |
|---|---|---|
| Viewpoint | End facing you, walls A and B marked | Same orientation on drawing |
| First leg | Measurement and endpoints | Drawing dimension and endpoints |
| Second leg | Separate measurement | Separate drawing dimension |
| Main bend | Sketch or angle reading if available | End drawing |
| Folded edges | Direction and intact shape | Matching features or differences |
| Visible face | Room-facing finish marked | Finish face identified |
| Panel contact | Rib tops, flat areas, or unknown | Intended contact shown or question |
| Length | Existing part and wall run, separately | Listed lengths to compare later |
Do not turn an unclear image into a precise angle. Write not measured and keep the end sketch. Ask for an end drawing that can be compared with it.
When comparing dimensions, check the endpoints first. A reading across the outside of a bend may differ from a drawing's straight leg measurement. Correct the description before deciding that the parts differ.
Look at how the panels reach the junction
Photograph each wall face approaching the corner. Show whether a raised rib or a flat portion ends nearest the trim. Keep a wider room view so the close-up has a location.
Note whether the existing piece lies over the panel faces or disappears behind them. If you cannot see that relationship, leave it unresolved. Different panel systems use different corner arrangements.
Find the installation guide for the exact wall panel. Look for its inside-corner drawing. Use that drawing to establish the part shape and fitting order for the proposed work.
Do not copy a corner arrangement from a different panel system. A similar appearance does not show what is hidden behind the finish.
Your building's drawings or the panel maker's installation instructions decide fastening patterns, support distances, and required overlaps. If the old arrangement lacks those details, ask an installer to identify it before changing it.
Choose the matching shape and finish
Examine Inside corner trim using your completed record. Ask for the actual end drawing if the product information does not show every bend. Compare the shape before discussing the final length and count.
Keep finish selection separate from fit. Look at a physical sample in the room if appearance matters. Record the finish name rather than trying to describe it only as dark or light.
Do not assume a special bend can be supplied. If the listed shape does not match, keep that difference on the page. Ask the installer how to finish the existing junction without forcing the candidate into it.
For the surrounding edges, use How to Plan Interior Metal Wall Panel Trim. It gives this corner a place on the room map.
Before you finish, check for three common mistakes: measuring a crushed end, forgetting the second leg, and omitting the folded edges. Your sketch, readings, and photos should all describe the same intact shape.