How to Check Cut-Edge Rust on Metal Siding
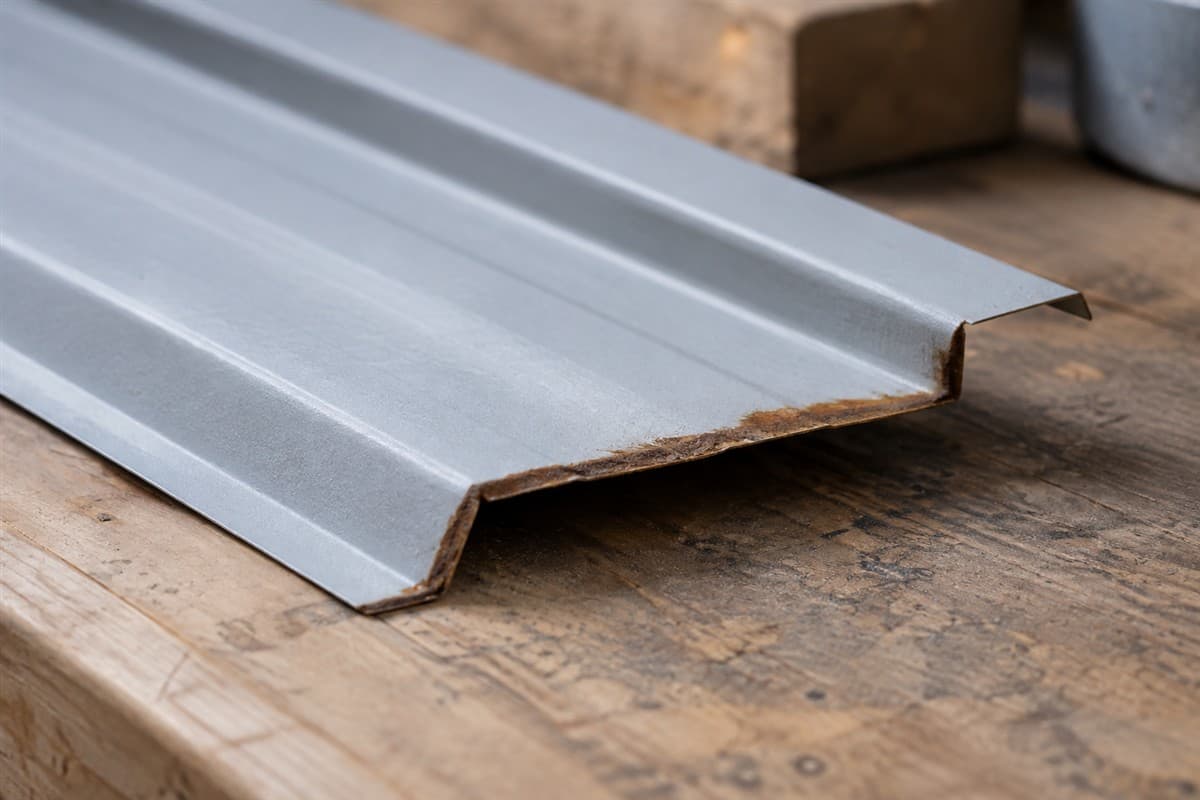
When brown marking appears along a siding edge, photograph the edge and the surrounding finish before treating it. Show where the sheet ends, whether another part covers it, and whether the finish is lifting nearby.
Then identify the panel and its finish so you can find the correct maintenance instructions. A photograph can show a condition. It cannot certify remaining strength or establish that a coat of paint will fix it.
Find the marked edge on the wall
Metal siding is sheet metal forming the building's outer wall surface. A cut edge is the sheet boundary left by cutting. Trim is bent metal finishing an edge or junction.
Draw the wall from outside. Mark doors, corners, the ground line, and the affected sheets. Give each marked edge a letter. State whether it is a lower end, upper end, opening edge, or edge at a joint.
An overlap is where one sheet covers part of another. Look for that relationship without separating installed parts. Keep a covered edge marked hidden when you cannot see it.
Gather a phone camera, notebook, pencil, ruler, tape measure, and gloves for handling a loose sample. Do the first inspection from the ground. Have a pro collect high or hidden views.
For any roof-level inspection, use suitable fall protection and hire a pro if safe access is beyond your skills.
Record whether the panel is installed or still loose. If it is loose, note when you first saw the marking and how the piece was stored. Do not assume its history from the appearance of the edge.
Take the edge-photo list in sequence
This photo list is the main aid for the job. Keep the same edge letter in every photo name and note.
- Whole wall view. Include the affected panel and a door or corner. Put its location letter on your paper sketch.
- Whole sheet view. Show which sheet end or side edge is marked. Include adjacent sheets so the extent is understandable.
- Face and edge together. Take a closer photo that shows the cut boundary and nearby outer finish. Keep the focus on the metal.
- Looking along the edge. With a safely accessible loose sample, show the edge from the side. Do not bend the sheet for this view.
- Measurement view. Put a ruler beside the visible marked area. Record the length of the affected edge and how far the marking extends onto the face.
- Nearby trim view. Show the surrounding trim, visible gaps, and any trapped dirt. Do not remove trim to get the photo.
- Other face view. Photograph the back only if safely exposed. If it is hidden, write back not seen.
- Comparison view. Show an adjacent intact-looking edge from a similar angle. Do not call it sound without inspection.
Take a second close picture without the ruler if it hides the edge. Write units beside the readings. Measurements describe the marked area, not an acceptable damage limit.
Keep the unedited originals. A tightly cropped picture is useful only when someone can connect it to the wall and sheet views. You do not need arrows or labels burned into the photos if the filenames and sketch agree.
Describe the condition without scraping it
Write what you see: a continuous brown line, separate spots, lifted finish, a visible hole, or an unclear edge. Do not poke the metal or peel the coating to test it.
Cutting a coated steel sheet exposes its edge, where corrosion can occur. Corrosion means deterioration of metal through reactions with its surroundings. The actual result depends on the material, coating, cutting method, and exposure.
Do not assume every cut end needs the same treatment. Nor should you assume it never needs attention. Use the instructions for the particular sheet and finish.
Separate edge marking from loose fragments on the face. Cutting debris can rust and stain nearby metal. Use How to Remove Metal Shavings from Roof Panels if loose particles are also present.
If the finish is lifting, describe where it begins and ends. Keep the hidden underside and overlap unresolved. Your record should not turn a visible line into a claim about the whole panel.
Pair the photos with the finish documents
Look through spare wrapping, receipts, and building papers for the panel name, material, finish name, and finish code. Copy the wording exactly. A finish code is the label identifying a finish option; it is not a diagnosis.
Search the maker's website for that panel's care instructions. Look under cut edges, edge corrosion, touch-up, cleaning, or maintenance. Touch-up means a small finish repair rather than repainting the whole surface.
Write the document name beside your photo list. Then add the questions it does not answer: which visible area needs treatment, whether hidden metal needs inspection, and whether the sheet should remain in service.
Avoid cleaning recipes from unrelated products. Instructions for one coated panel do not establish the repair method for another. If the original finish cannot be identified, send the record to a metal-building repair pro before choosing a coating.
Turn the result into a specific next step
Have holes, torn edges, loose sheets, or extensive deterioration assessed before cleaning or bending the affected part. If replacement is required, first match the end shape using How to Match Old Metal Roof Panels. That identification process also helps with siding samples.
Compare 26-gauge PBR panel and 26-gauge R-panel only after identifying the existing profile. If damaged lower-edge trim is involved, Base trim is a candidate pending confirmation. It does not repair corrosion simply by covering the edge.
For the broader wall-edge parts list, use What trim pieces does a metal building wall need?. Keep this edge-condition record attached to the affected item.
Your building's drawings or the panel maker's installation instructions decide fastening patterns, overlaps, and support requirements for replacement work. Finish the inspection with a clear outcome: care method identified, replacement scope identified, or a named question awaiting inspection. Keep that outcome beside the photos.