How to Inspect a Leaking Lean-To Roof Junction
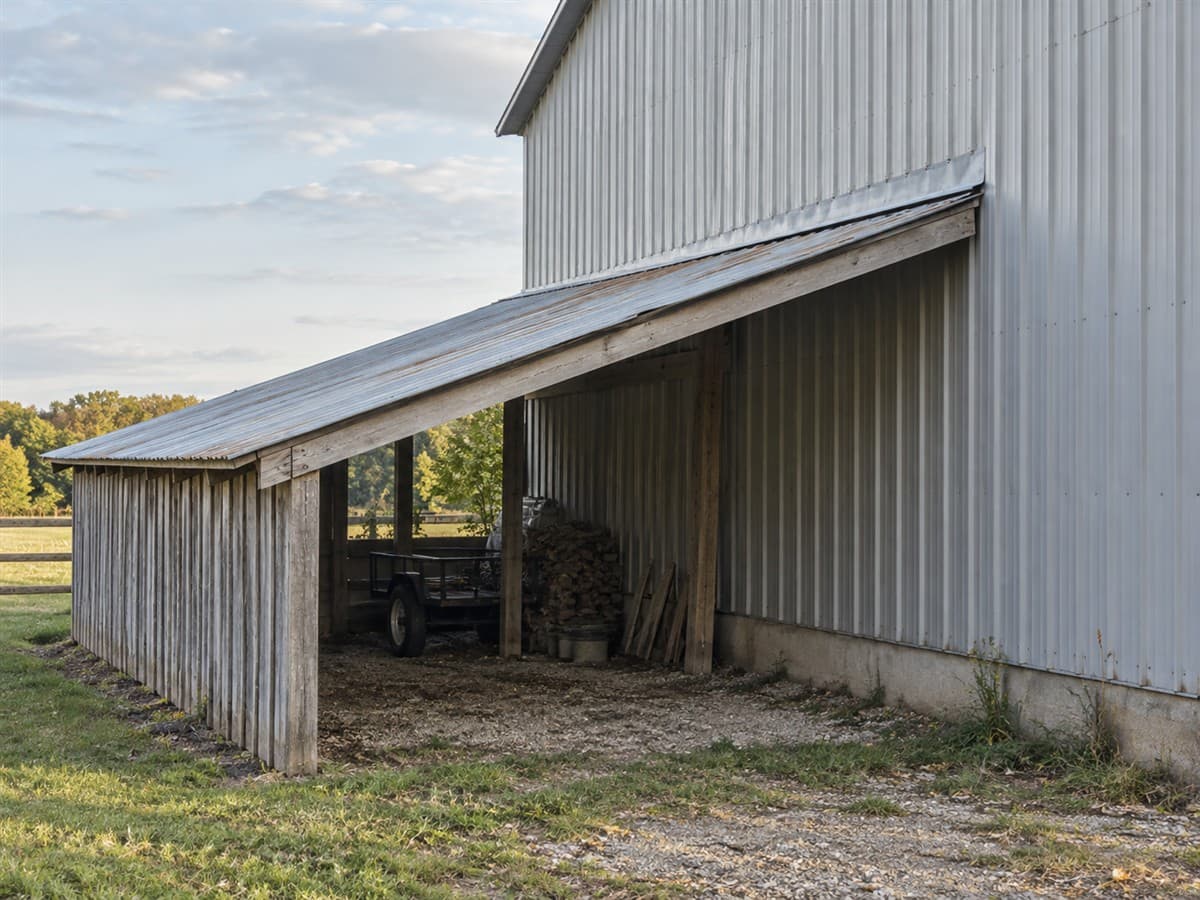
Begin inside with the drip location, then photograph the roof-to-wall junction from the ground. Keep the full junction, its ends, and the wall above it in the record. That gives a roofer more useful evidence than one close-up of a stained panel.
A lean-to has a single roof slope beside another building. Its junction is where the roof meets the wall. Flashing is shaped material used to manage water at that meeting place.
Use suitable fall protection for roof work and hire a pro if you cannot reach the junction safely.
This inspection gathers repair evidence. It does not prove where water entered or whether the attachment is sound.
Map the symptom before touching the joint
Bring a phone, notebook, pencil, and flashlight. Use the flashlight from a safe floor position. Do not enter a wet area containing electrical hazards, falling material, or visibly unstable framing.
Draw the lean-to roof as a rectangle on paper. Add the barn wall and one fixed landmark, such as a door. Mark each indoor drip or stain on that sketch.
During rain, observe from a safe sheltered location. Write when the drip begins and whether it stops after rain. Note the wind direction if you can observe it safely. Record what happened, without naming the cause.
Take a dry-weather photograph from the same indoor position later. Keep old staining separate from active water. A stain tells you where moisture became visible; it does not establish the outside entry point.
If a bucket or movable item is already protecting belongings, photograph the original wet location too. Do not let a relocated collection point become the spot on your sketch.
Collect the outside views in a useful order
- Take the whole lean-to view. Show the barn wall, roof slope, and low edge. Include your fixed landmark.
- Photograph the full wall junction. Stand back far enough to include both ends where possible. Keep the wall above it visible.
- Take one view of each end. Show where the junction meets a sloping roof edge or corner. Do not crop away adjoining trim.
- Photograph visible joins in the flashing. A join is where separate pieces meet. Use camera zoom from safe ground rather than climbing for a close-up.
- Show the lower wall-covering edge. Include visible gaps, bends, and previous surface patches. Mark hidden layers as hidden.
- Photograph the low edge and drainage. Include gutters and outlets if present. Note visible debris without diagnosing it as the leak source.
- Add interior junction views. From the floor, show the roof underside and any visible water trail. Keep your location landmark in a wider picture.
Do not lift flashing, pull siding away, or loosen a fastener during this photo pass. Those actions change the joint before the roofer has inspected it.
Build this junction photo kit
Name each image by its view and location. This kit helps the roofer connect outside conditions with indoor symptoms.
| Photo name | Include in the frame | Add to the note |
|---|---|---|
| Whole lean-to | Roof, wall, low edge, landmark | Which building face |
| Entire upper junction | Full flashing run and wall above | Ends hidden or visible |
| First junction end | Roof edge, corner, adjoining trim | Visible openings or patches |
| Other junction end | Same context at opposite end | Differences from first end |
| Flashing join | Both adjoining pieces | Visible separation or unclear |
| Wall-covering edge | Wall above and roof below | What the photo cannot show |
| Drainage view | Low edge, gutter, outlet | Visible debris or damage |
| Indoor wet location | Drip area and landmark | Date and weather observation |
| Indoor dry comparison | Same view after rain | Staining versus fresh water |
| Visible framing concern | Wide context plus reachable close view | Bend, tear, movement, or hidden |
Keep the original files, not just cropped copies. Write a short question below each unclear photo. For example: “The upper flashing edge is hidden; what must be inspected?”
Separate water evidence from framing concerns
A bent member, torn connection, or changed attachment belongs in the record even if the job began with a leak. Photograph it from a safe place. Have an engineer assess structural concerns before repair work changes the area.
A girt supports wall panels. A purlin supports roof panels. Include readable part marks and nearby braces in the wider view if they are visible. Do not loosen those parts to look behind the flashing.
The building's own drawings decide member sizes, spans, attachment patterns, overlaps, and loads. If those records are missing, the engineer must establish the repair requirements. A dry interior after one rain does not verify the structure.
For a damaged wall member, use How to Identify a Replacement Metal Building Girt. Keep that structural record alongside the junction photo kit.
Ask the roofer to identify the repair before selecting parts
Send the roof sketch, weather notes, and photographs together. Ask what needs closer inspection: the panel, flashing, wall covering, or several areas. Water may travel before it becomes visible inside, so avoid insisting that the repair must be directly above the drip.
Ask the roofer to identify the actual panel profile and the installation detail for that junction. Use Headwall vs Sidewall Flashing: How to Tell Them Apart to describe its orientation. Have inaccessible views collected during their inspection.
Request a repair description that names the affected joint and replacement parts. The building's drawings or panel maker's installation instructions decide fastening patterns and overlaps. The exact junction detail should also establish assembly order and seal placement.
Choose material only after the cause is established
The listed Butyl tape sealant is a sealant-tape candidate for a joint whose instructions call for it. It is not a diagnosis or a blanket surface patch. Use How to Use Butyl Tape on a Metal Roof after the intended joint is confirmed.
If a panel replacement is needed, compare 26-gauge PBR panel with the actual required profile. Use How to Choose a Replacement Metal Roof Panel for the selection record. Do not assume replacing the most stained sheet will repair the junction.
Keep the same indoor observation point after the repair. Record later rain and any returning symptom for the roofer. Your photo kit gives you a consistent before-and-after view without claiming that photographs alone certify a leak repair or structural attachment.