How to Match Metal Roof Foam Closure Strips
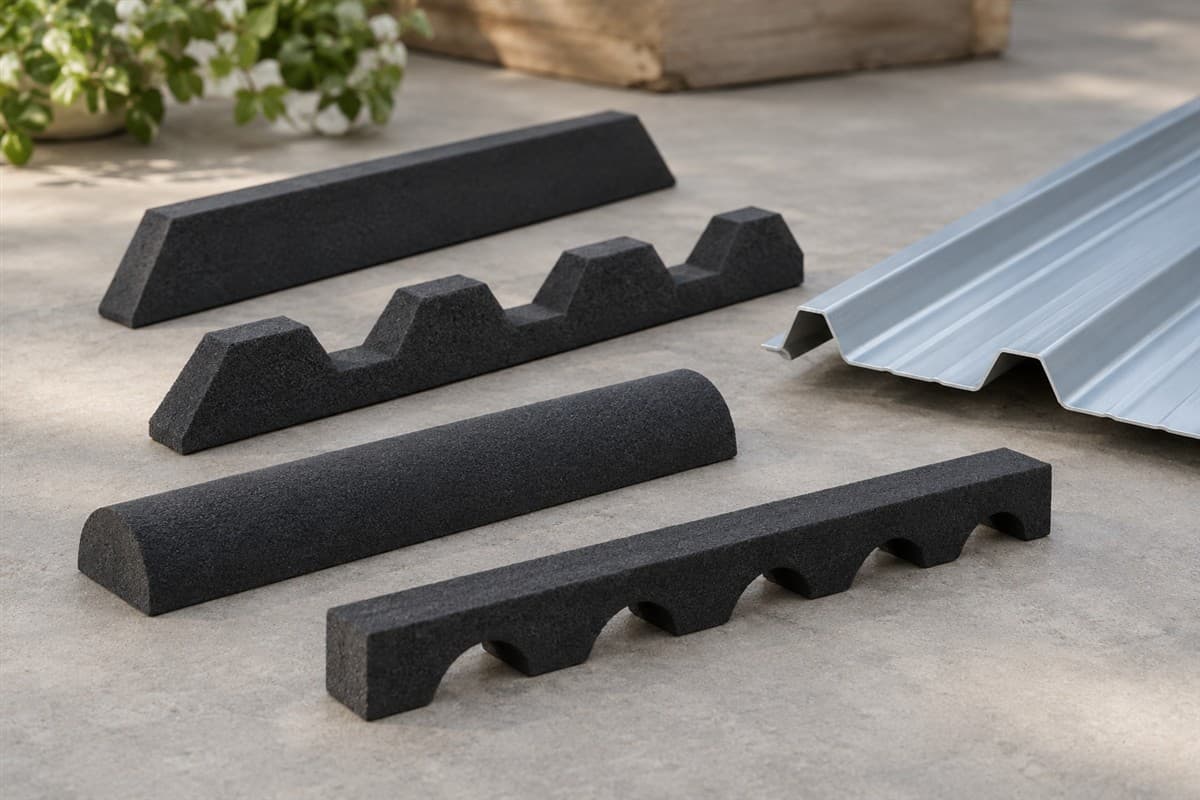
Two foam strips can have the same length and still fit different metal panels. Match the shaped face to the panel's end outline. Check the large ribs, smaller ridges, and spaces between them before choosing a strip.
You can do most of this comparison on a bench with a spare panel piece. This page helps spot a shape mismatch. Use Inside vs Outside Foam Closures: Which Do You Need? when you still need to decide which side of the panel the closure belongs against.
Bring the panel shape to the bench
A closure is a shaped strip that fills gaps at a panel edge. The profile is the panel's end shape. Its raised ridges are ribs. The closure's shaped face must follow the corresponding panel surface.
Find a spare panel or an offcut, a leftover piece from cutting a sheet. An intact piece is more useful than a crushed end. Leave installed closures in place while collecting identification information.
For roof inspection, use suitable fall protection and hire a pro if safe access is beyond your skills.
Gather a ruler, tape measure, pencil, stiff paper, phone camera, and gloves for handling metal. Keep any old closure bag or label. Look for the panel name on spare wrapping and old receipts.
Search the panel maker's website for the exact panel name and installation guide. Find a profile drawing showing the full end outline. Then find the closure drawing for that panel, rather than using a general photo of foam strips.
If the panel name is unknown, How to Match Old Metal Roof Panels helps identify it. Do not assume every ribbed sheet uses the same closure.
Measure the rib pattern in order
- Set the sample upright in your notes. Place its outdoor face upward. Mark that face and the viewing direction on your sketch.
- Draw the entire visible end. Include the raised ribs and smaller ridges between them. Trace beside the sample without pressing fingers against sharp edges.
- Measure rib spacing. Measure from the center of one major rib to the center of the next. Use the same feature as each endpoint.
- Measure rib height. Rest a straight ruler across the rib top and measure down to the adjacent flat panel area. Record what you measured.
- Measure rib width. Record the width at its top and at its base separately. Use a straight end view so the sloping sides are visible.
- Show the strip ends. Photograph how the closure shape begins and ends. Compare those features with its own drawing.
These dimensions identify existing parts. They do not decide support spacing, connection strength, or a fastening pattern.
Do not stretch old foam to make the readings agree. If it is torn or crushed, use the intact panel and matching drawings as the comparison reference. Write damaged beside the old sample's condition.
Keep strip length separate from the rib pattern. A matching length cannot resolve a different rib height or shape. Nor can the appearance of one peak establish that the whole strip matches.
Use the drawing-backed mismatch checklist
Draw the panel outline on one sheet and the candidate closure outline on another. Copy the maker's stated dimensions beside each outline. Do not treat a resized picture as a full-size template.
Compare the outlines using this checklist. Record match, differs, or unknown at every line.
| Comparison | Look for | Mismatch to flag |
|---|---|---|
| Major rib centers | Same sequence across the panel | Peaks drift out of alignment |
| Rib height | Matching top-to-flat shape | Foam peak or recess is too shallow |
| Rib top width | Same upper face shape | Foam meets only part of the rib |
| Rib base width | Corresponding slope and base | Gaps beside the rib slopes |
| Smaller ridges | Matching features between major ribs | Foam bridges or misses a ridge |
| Contact face | Shape follows the intended panel face | Strip is being compared upside down |
| End features | Both ends agree with the closure drawing | End shape remains unexplained |
| Product identity | Exact closure and panel names agree | Generic family name only |
This is an identification aid built from the actual drawings. It does not establish a sealing result. Attach the drawings and sample photos so another person can review each difference.
With a loose candidate sample, set it gently against the correct panel face. Look across the shaped contact area. If a peak, recess, or small ridge differs, photograph that location. Do not cut, pull, or crush the sample to hide it.
Separate shape from installation choices
An inside closure follows the underside of the panel. An outside closure follows its outer face beneath covering trim. The labels describe orientation; they do not establish every location where that product should be used.
Use the panel maker's installation guide to find the closure shown at your roof edge. A ventilation opening needs its intended airflow path, so do not fill it merely because a foam strip appears to fit.
Your building's drawings or the panel maker's instructions decide fastening patterns, required overlaps, and closure placement within the connection. Copy those requirements from the correct roof section. Do not borrow them from another panel's drawing.
Decide whether the candidate belongs on your list
The catalog lists Foam closure strips for PBR and R-panel for PBR and R-panel. This entry awaits confirmation. Ask for its exact profile drawing and orientation before treating it as the match for your measured sheet.
Send the end photo, rib measurements, and checklist together. Ask about the specific uncertain feature, such as a different small ridge between major ribs. That is more useful than asking whether it fits a metal roof.
Once shape and location are settled, use How to count screws and closures for a metal roof for quantities. Keep unresolved matches out of that calculation. Your comparison is finished when every feature agrees or the remaining difference is clearly named.